Showing posts with label Navigation. Show all posts

Multi Levels and Directions Subs Menu

Friday, January 1, 2010 |

1.Add this whole code before the ]]></b:skin> tag:

/* ================================================================
Please don't remove this, you will find Mutiaramail for help easily
by this credit.
This menu is brought to you by Mutiaramail (http://Mutiaramail.blogspot.com)
Copyright (c) 2005-2007 Stu Nicholls. All rights reserved.
This stylesheet and the associated (x)html may be modified in any
way to fit your requirements.

=================================================================== */

#outer {width:750px; height:350px; background:url(filters.jpg) no-repeat right bottom; position:relative;}
.pad1 {width:51px; height:25px; background:#fc0; float:left; margin-top:3px; margin-right:3px; border:1px solid #000;}
.pad2 {width:52px; height:25px; background:#fc0; float:left; margin-top:3px; border:1px solid #000;}
.topline {width:748px; height:3px; border:1px solid #000; background:#fc0; font-size:1px;}

#menu {list-style-type:none; padding:0; margin:0 0 0 3px;}
#menu ul {list-style-type:none; padding:0; margin:0;}
#menu li {float:left; background:#cdc; margin:3px 3px 0 0; border:1px solid #000; width:123px; height:25px;}
#menu li.sub {background:#aba;}

/* for IE5.5 and IE6 only */

#menu li a {display:block; color:#000; height:25px; font-family:arial, sans-serif; font-size:11px; line-height:24px; width:123px; text-decoration:none; text-align:center;}
#menu li a table {position:absolute; left:0; top:-1px; border-collapse:collapse; width:0; height:0;}

#menu :hover {color:#fff; background:#898; position:relative;}
#menu :hover > a {color:#fff; background:#898;}

#menu ul,
#menu :hover ul ul,
#menu :hover ul :hover ul ul,
#menu :hover ul :hover ul ul.left {visibility:hidden; width:0; height:0; overflow:hidden;}

#menu :hover ul {visibility:visible; overflow:visible; position:absolute; height:auto; width:128px; left:-1px;top:26px; background:url(transparent.gif);} /* the background image is for IE7 */

#menu :hover ul :hover ul,
#menu :hover ul :hover ul :hover ul {visibility:visible; overflow:visible; height:auto; width:128px; padding:9px 3px; left:100px; top:0;}

#menu :hover ul :hover ul.left,
#menu :hover ul :hover ul :hover ul.left {visibility:visible; overflow:visible; height:auto; width:128px; padding:9px 3px; left:-106px; top:0;}

<script type="text/javascript">
function ieFix(topLevel)
{
var ua = navigator.userAgent;
var isMSIE = (navigator.appName == "Microsoft Internet Explorer");
var isMSIE5_5 = isMSIE && (ua.indexOf('MSIE 5.5') != -1);
var isMSIE6 = isMSIE && (ua.indexOf('MSIE 6.0') != -1);
if (isMSIE5_5 || isMSIE6)
{
document.getElementById(topLevel).innerHTML = document.getElementById(topLevel).innerHTML.replace (/<ul/gi,"<table><tr><td><ul").replace (/<\/ul>/gi,"</ul></td></tr></table></a>");
for (i=0;i<document.getElementsByTagName("li").length; i++)
{
if (document.getElementsByTagName("li").item(i).className == "sub")
{
document.getElementsByTagName("li").item(i).innerHTML = document.getElementsByTagName("li").item(i).innerHTML.replace(/<\/a>/i,"");
}
}
}
}
</script>

2.The first step is done, very easy right?Ok now Save and create a HTML/Javascript(Add A Gadget) and paste this code, at this step you can change the names,categories,labels by your own:

<div id="outer">
<div class="topline"></div>
<div class="pad1"></div>
<ul id="menu">
<li><a href="#nogo1">Home</a></li>
<li class="sub"><a href="#nogo2">Products</a>
<ul>
<li class="sub"><a href="#nogo3">Cameras</a>
<ul class="left">
<li><a href="#nogo4">Nikon</a></li>
<li><a href="#nogo5">Minolta</a></li>
<li><a href="#nogo6">Pentax</a></li>
</ul>

</li>
<li class="sub"><a href="#nogo7">Lenses </a>
<ul>
<li><a href="#nogo8">Wide Angle</a></li>
<li><a href="#nogo9">Standard</a></li>
<li><a href="#nogo10">Telephoto</a></li>
<li class="sub"><a href="#nogo11">Zoom</a>

<ul>
<li><a href="#nogo12">35mm to 125mm</a></li>
<li><a href="#nogo13">50mm to 250mm</a></li>
<li><a href="#nogo14">125mm to 500mm</a></li>
</ul>
</li>
<li><a href="#nogo">Mirror</a></li>

<li class="sub"><a href="#nogo15">Non-standard</a>
<ul class="left">
<li><a href="#nogo16">Bayonet mount</a></li>
<li><a href="#nogo17">Screw mount</a></li>
</ul>
</li>
</ul>

</li>
<li><a href="#nogo18">Flash Guns</a></li>
<li><a href="#nogo19">Tripods</a></li>
<li><a href="#nogo20">Filters</a></li>
</ul>
</li>
<li class="sub"><a href="#nogo21">Services</a>

<ul>
<li><a href="#nogo22">Printing</a></li>
<li><a href="#nogo23">Photo Framing</a></li>
<li><a href="#nogo24">Retouching</a></li>
<li><a href="#nogo25">Archiving</a></li>
</ul>
</li>

<li class="sub"><a href="#nogo26">Shop</a>
<ul>
<li><a href="#nogo27">Online</a></li>
<li><a href="#nogo28">Catalogue</a></li>
<li><a href="#nogo29">Mail Order</a></li>
</ul>
</li>

<li class="sub"><a href="#nogo30">Contacts</a>
<ul>
<li><a href="#nogo31">Support</a></li>
<li class="sub"><a href="#nogo32">Sales</a>
<ul class="left">
<li><a href="#nogo33">USA</a></li>
<li><a href="#nogo34">Canadian</a></li>
<li><a href="#nogo35">South American</a></li>

<li class="sub"><a href="#nogo36">European</a>
<ul class="left">
<li><a href="#nogo37">British</a></li>
<li><a href="#nogo38">French</a></li>
<li><a href="#nogo39">German</a></li>

<li><a href="#nogo40">Spanish</a></li>
<li><a href="#nogo41">Italian</a></li>
</ul>
</li>
<li><a href="#nogo42">Canadian</a></li>
<li><a href="#nogo43">Asian</a></li>
</ul>
</li>
<li><a href="#nogo44">Buying</a></li>
<li><a href="#nogo45">Photographers</a></li>
<li><a href="#nogo46">Stockist</a></li>
<li><a href="#nogo47">General</a></li>
</ul>
</li>
</ul>
<div class="pad2"></div>
</div>

Smooth Navigational Menu Vertical dan Horizon

Friday, October 23, 2009 |

Hallo sobat saya menawarkan lagi model navigasi yang sekaligus Vertical dan Horizon agar sobat tidak perlu mencari-cari itu kalau cocok kalo gak cocok sobat comment aja, siapa tahu dapat wangsit lagi he..he..he.Tapi sebelumnya sobat click dulu demonya kalau cocok ya ambil kalo tidak skip aza.
1-Login ke blog anda
2-Layout
3-Edit
4-Letakkan code dibawah ini sebelum </head>
<script type="text/javascript" src="http://ajax.googleapis.com/ajax/libs/jquery/1.2.6/jquery.min.js"></script>
<script type="text/javascript" src="ddsmoothmenu.js">

/***********************************************************************************************************************
* Smooth Navigational Menu- (c) Dynamic Drive DHTML code library (www.dynamicdrive.com)
* This notice MUST stay intact for legal use
* Visit Dynamic Drive at http://www.mutiaramail.blogspot.com/ for full source code
************************************************************************************************************************/

</script>

<script type="text/javascript">

ddsmoothmenu.init({
mainmenuid: "smoothmenu1", //menu DIV id
orientation: 'h', //Horizontal or vertical menu: Set to "h" or "v"
classname: 'ddsmoothmenu', //class added to menu's outer DIV
//customtheme: ["#1c5a80", "#18374a"],
contentsource: "markup" //"markup" or ["container_id", "path_to_menu_file"]
})

ddsmoothmenu.init({
mainmenuid: "smoothmenu2", //Menu DIV id
orientation: 'v', //Horizontal or vertical menu: Set to "h" or "v"
classname: 'ddsmoothmenu-v', //class added to menu's outer DIV
//customtheme: ["#804000", "#482400"],
contentsource: "markup" //"markup" or ["container_id", "path_to_menu_file"]
})

</script>


Horizon Navigation
5.1 Letakkan code dibawah ini sebelum ]]></b:skin>
.ddsmoothmenu{
font: bold 12px Verdana;
background: #414141; /*background of menu bar (default state)*/
width: 100%;
}

.ddsmoothmenu ul{
z-index:100;
margin: 0;
padding: 0;
list-style-type: none;
}

/*Top level list items*/
.ddsmoothmenu ul li{
position: relative;
display: inline;
float: left;
}

/*Top level menu link items style*/
.ddsmoothmenu ul li a{
display: block;
background: #414141; /*background of menu items (default state)*/
color: white;
padding: 8px 10px;
border-right: 1px solid #778;
color: #2d2b2b;
text-decoration: none;
}

* html .ddsmoothmenu ul li a{ /*IE6 hack to get sub menu links to behave correctly*/
display: inline-block;
}

.ddsmoothmenu ul li a:link, .ddsmoothmenu ul li a:visited{
color: white;
}

.ddsmoothmenu ul li a.selected{ /*CSS class that's dynamically added to the currently active menu items' LI A element*/
background: black;
color: white;
}

.ddsmoothmenu ul li a:hover{
background: black; /*background of menu items during onmouseover (hover state)*/
color: white;
}

/*1st sub level menu*/
.ddsmoothmenu ul li ul{
position: absolute;
left: 0;
display: none; /*collapse all sub menus to begin with*/
visibility: hidden;
}

/*Sub level menu list items (undo style from Top level List Items)*/
.ddsmoothmenu ul li ul li{
display: list-item;
float: none;
}

/*All subsequent sub menu levels vertical offset after 1st level sub menu */
.ddsmoothmenu ul li ul li ul{
top: 0;
}

/* Sub level menu links style */
.ddsmoothmenu ul li ul li a{
font: normal 13px Verdana;
width: 160px; /*width of sub menus*/
padding: 5px;
margin: 0;
border-top-width: 0;
border-bottom: 1px solid gray;
}

/* Holly Hack for IE \*/
* html .ddsmoothmenu{height: 1%;} /*Holly Hack for IE7 and below*/


/* ######### CSS classes applied to down and right arrow images ######### */

.downarrowclass{
position: absolute;
top: 12px;
right: 7px;
}

.rightarrowclass{
position: absolute;
top: 6px;
right: 5px;
}

/* ######### CSS for shadow added to sub menus ######### */

.ddshadow{
position: absolute;
left: 0;
top: 0;
width: 0;
height: 0;
background: silver;
}

.toplevelshadow{ /*shadow opacity. Doesn't work in IE*/
opacity: 0.8;
}

5.2 Letakkan code dibawah ini pada HTML
<div id="smoothmenu1" class="ddsmoothmenu">
<ul>
<li><a href="http://www.dynamicdrive.com">Item 1</a></li>
<li><a href="#">Folder 0</a>
<ul>
<li><a href="#">Sub Item 1.1</a></li>
<li><a href="#">Sub Item 1.2</a></li>
<li><a href="#">Sub Item 1.3</a></li>
<li><a href="#">Sub Item 1.4</a></li>
<li><a href="#">Sub Item 1.2</a></li>
<li><a href="#">Sub Item 1.3</a></li>
<li><a href="#">Sub Item 1.4</a></li>
</ul>
</li>
<li><a href="#">Folder 1</a>
<ul>
<li><a href="#">Sub Item 1.1</a></li>
<li><a href="#">Sub Item 1.2</a></li>
<li><a href="#">Sub Item 1.3</a></li>
<li><a href="#">Sub Item 1.4</a></li>
<li><a href="#">Sub Item 1.2</a></li>
<li><a href="#">Sub Item 1.3</a></li>
<li><a href="#">Sub Item 1.4</a></li>
</ul>
</li>
<li><a href="#">Item 3</a></li>
<li><a href="#">Folder 2</a>
<ul>
<li><a href="#">Sub Item 2.1</a></li>
<li><a href="#">Folder 2.1</a>
<ul>
<li><a href="#">Sub Item 2.1.1</a></li>
<li><a href="#">Sub Item 2.1.2</a></li>
<li><a href="#">Folder 3.1.1</a>
<ul>
<li><a href="#">Sub Item 3.1.1.1</a></li>
<li><a href="#">Sub Item 3.1.1.2</a></li>
<li><a href="#">Sub Item 3.1.1.3</a></li>
<li><a href="#">Sub Item 3.1.1.4</a></li>
<li><a href="#">Sub Item 3.1.1.5</a></li>
</ul>
</li>
<li><a href="#">Sub Item 2.1.4</a></li>
</ul>
</li>
</ul>
</li>
<li><a href="http://www.dynamicdrive.com/style/">Item 4</a></li>
</ul>
<br style="clear: left" />
</div>

Vertical Navigation
6.1 Letakkan code dibawah ini sebelum ]]></b:skin>
.ddsmoothmenu-v ul{
margin: 0;
padding: 0;
width: 170px; /* Main Menu Item widths */
list-style-type: none;
font: bold 12px Verdana;

border-bottom: 1px solid #ccc;
}

.ddsmoothmenu-v ul li{
position: relative;
}

/* Top level menu links style */
.ddsmoothmenu-v ul li a{
display: block;
overflow: auto; /*force hasLayout in IE7 */
color: white;
text-decoration: none;
padding: 6px;
border-bottom: 1px solid #778;
border-right: 1px solid #778;
}

.ddsmoothmenu-v ul li a:link, .ddsmoothmenu-v ul li a:visited, .ddsmoothmenu-v ul li a:active{
background: #414141; /*background of menu items (default state)*/
color: white;
}


.ddsmoothmenu-v ul li a.selected{ /*CSS class that's dynamically added to the currently active menu items' LI A element*/
background: black;
color: white;
}

.ddsmoothmenu-v ul li a:hover{
background: black; /*background of menu items during onmouseover (hover state)*/
color: white;
}

/*Sub level menu items */
.ddsmoothmenu-v ul li ul{
position: absolute;
width: 170px; /*Sub Menu Items width */
top: 0;
font-weight: normal;
visibility: hidden;
}


/* Holly Hack for IE \*/
* html .ddsmoothmenu-v ul li { float: left; height: 1%; }
* html .ddsmoothmenu-v ul li a { height: 1%; }
/* End */

6.2 Letakkan code dibawah ini pada HTML
<div id="smoothmenu2" class="ddsmoothmenu-v">
<ul>
<li><a href="http://www.dynamicdrive.com">Item 1</a></li>
<li><a href="#">Folder 0</a>
<ul>
<li><a href="#">Sub Item 1.1</a></li>
<li><a href="#">Sub Item 1.2</a></li>
<li><a href="#">Sub Item 1.3</a></li>
<li><a href="#">Sub Item 1.4</a></li>
<li><a href="#">Sub Item 1.2</a></li>
<li><a href="#">Sub Item 1.3</a></li>
<li><a href="#">Sub Item 1.4</a></li>
</ul>
</li>
<li><a href="#">Folder 1</a>
<ul>
<li><a href="#">Sub Item 1.1</a></li>
<li><a href="#">Sub Item 1.2</a></li>
<li><a href="#">Sub Item 1.3</a></li>
<li><a href="#">Sub Item 1.4</a></li>
<li><a href="#">Sub Item 1.2</a></li>
<li><a href="#">Sub Item 1.3</a></li>
<li><a href="#">Sub Item 1.4</a></li>
</ul>
</li>
<li><a href="#">Item 3</a></li>
<li><a href="#">Folder 2</a>
<ul>
<li><a href="#">Sub Item 2.1</a></li>
<li><a href="#">Folder 2.1</a>
<ul>
<li><a href="#">Sub Item 2.1.1</a></li>
<li><a href="#">Sub Item 2.1.2</a></li>
<li><a href="#">Folder 3.1.1</a>
<ul>
<li><a href="#">Sub Item 3.1.1.1</a></li>
<li><a href="#">Sub Item 3.1.1.2</a></li>
<li><a href="#">Sub Item 3.1.1.3</a></li>
<li><a href="#">Sub Item 3.1.1.4</a></li>
<li><a href="#">Sub Item 3.1.1.5</a></li>
</ul>
</li>
<li><a href="#">Sub Item 2.1.4</a></li>
</ul>
</li>
</ul>
</li>
<li><a href="http://www.dynamicdrive.com/style/">Item 4</a></li>
</ul>
<br style="clear: left" />
</div>

Selamat mencoba dan semoga mimpi indah

Navigasi CSS Horizontal hover menu

Wednesday, September 9, 2009 |

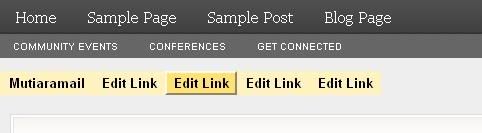
Hi sobat saya datang kembali membawa tip Navigation buat anda.Contoh sepeerti ini

1-Log in ke account blogger anda.
2-Click Layout--->
3-Click Edit HTML
4-Letakkan kode dibawah ini sebelum ]]></b:skin> tag :
.hovermenu ul{
font: bold 13px arial;
padding-left: 0;
margin-left: 0;
height: 20px;
}

.hovermenu ul li{
list-style: none;
display: inline;
}

.hovermenu ul li a{
padding: 2px 0.5em;
text-decoration: none;
float: left;
color: black;
background-color: #FFF2BF;
border: 2px solid #FFF2BF;
}

.hovermenu ul li a:hover{
background-color: #FFE271;
border-style: outset;
}

html>body .hovermenu ul li a:active{ /* Apply mousedown effect only to NON IE browsers */
border-style: inset;
}

5-Letakkan kode dibawah ini pada HTML anda
<div class='hovermenu'>
<ul>
<li><a href='http://www.mutiaramail.blogspot.com'>Mutiaramail</a></li>
<li><a href='#http://Edit Link'>Edit Link</a></li>
</ul>
</div>

6-Simpan dan selesai

Trick Dropline Menus

Thursday, September 3, 2009 |

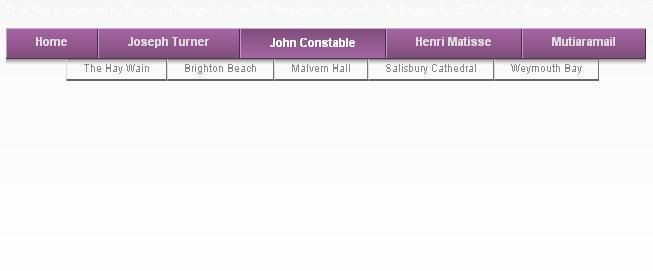
Friend dah lama nih gak posting akhirnya kangen juga posting.Saya ada tips buat anda ikuti aja stepnya.

1-Login ke account blogger anda.
2-Click Layout--->
3-Click Edit HTML
4-Letakkan kode dibawah ini sebelum ]]></b:skin> tag :
/* ================================================================
This copyright notice must be kept untouched in the stylesheet at
all times.
The original version of this stylesheet and the associated html
is available at http://www.sumbloggers.com.
Follow the instruction to make this menu on mutiaramail.blogspot.com
=================================================================== */
#nav {
height:36px; position:relative; font-family:arial, verdana, sans-serif; font-size:11px;z-index:500;
}
#nav .select {
margin:0; padding:0; list-style:none; white-space:nowrap;
}
#nav li {
float:left; background:url(blank_over_p.gif);
}
#nav .select a {
display:block; height:36px; float:left; background: url(blank_p.gif); padding:0 0 0 15px; text-decoration:none; line-height:25px; white-space:nowrap; color:#ddd;
}
#nav .select a b {
display:block; padding:0 30px 10px 15px; background:url(blank_p.gif) right top;
}
#nav .select li:hover a {
background: url(blank_over_p.gif); padding:0 0 0 15px; line-height:27px; cursor:pointer; color:#fff;
}
#nav .select li:hover a b {
display:block; padding:0 30px 9px 15px; background:url(blank_over_p.gif) right top; cursor:pointer;
}
#nav .sub {
display:none; margin:0; padding:0 0 0 60px;list-style:none;
}
#nav .sub li {background:transparent;}
#nav .select li:hover .sub {
height:18px; display:block; position:absolute; float:left; width:750px; top:28px; left:0; text-align:center;
}
#nav .select li:hover .sub li a {
display:block;height:18px; line-height:16px; float:left; background:transparent url(transparent.gif); padding:0 16px; margin:0; white-space:nowrap; border:1px solid #000; border-color:#888 #777 #666 #ddd; color:#888;font-size:10px;
}
#nav .select li:hover .sub li a:hover {
color:#000; background:#e8e8e8; border-color: #fff #333 #000 #fff; line-height:15px;
}

5-Letakkan kode dibawah ini sebelum </head> tag:
<script src="stuHover.js" type="text/javascript"></script>
6-Letakkan kode dibawah ini pada HTML anda :
<div id='nav'>
<ul class='select'><li><a href='#'><b>Home</b></a></li>
<li><a href='#'><b>Joseph Turner</b></a>
<ul class='sub'>
<li><a href='#'>Fishermen at Sea</a></li>
<li><a href='#'>The Shipwreck</a></li>
<li><a href='#'>The Vale of Ashburnham</a></li>
<li><a href='#'>Crossing the Brook</a></li>
</ul>
</li>
<li><a href='#'><b>John Constable</b></a>
<ul class='sub'>
<li><a href='#'>The Hay Wain</a></li>
<li><a href='#'>Brighton Beach</a></li>
<li><a href='#'>Malvern Hall</a></li>
<li><a href='#'>Salisbury Cathedral</a></li>
<li><a href='#'>Weymouth Bay</a></li>
</ul>
</li>
<li><a href='#'><b>Henri Matisse</b></a>
<ul class='sub'>
<li><a href='#'>The Girl with Green Eyes</a></li>
<li><a href='#'>The Dream</a></li>
<li><a href='#'>Woman in Blue</a></li>
<li><a href='#'>The Yellow Dress</a></li>
<li><a href='#'>The Piano Lesson</a></li>
</ul>
</li>
<li><a href='#'><b>Mutiaramail</b></a>
<ul class='sub'>
<li><a href='http://mutiaramail.blogspot.com/2008/12/about-me.html'>About Mutiaramail</a></li>
<li><a href='http://mutiaramail.blogspot.com'>Need for help</a></li>
<li><a href='http://sumbloggers.blogspot.com'>Blog Invest</a></li>
<li><a href='http://mutiaramail.blogspot.com'>Css Menu</a></li>
<li><a href='http://mutiaramail.blogspot.com'>How to make this menu?</a></li>
</ul>
</li>
</ul>
</div>

7-Download perlengkapannya jangan lupa ganti kode yang berwarna biru.

Tips Membuat Navigasi Vertical

Monday, August 31, 2009 |

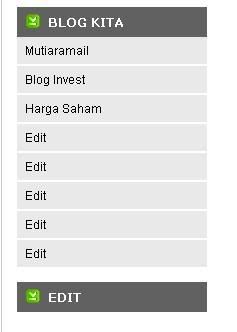
Hai sobat yang budiman saya menyediakan bagi para pencari navigasi Vertical, kita langsung saja.Et Contohnya kaya ini:

1-Login ke account blogger anda.
2-Click Layout---->EDIT HTML,Jangan lupa beri tanda centang pada kotak EXPAND WIDGET sebelumnya anda backup dulu template sobat klik Download Template Lengkap lalu simpat pada folder anda.
3-Copy pastekan script di bawah ini tepat diatas kode </head>;
<script type="text/javascript" src="http://ajax.googleapis.com/ajax/libs/jquery/1.3.2/jquery.min.js"></script>
<script type="text/javascript" src="ddaccordion.js">
/***********************************************
* Follow www.mutiaramail.blogspot.com)
***********************************************/
</script>

<script type="text/javascript">
ddaccordion.init({
headerclass: "headerbar", //Shared CSS class name of headers group
contentclass: "submenu", //Shared CSS class name of contents group
revealtype: "mouseover", //Reveal content when user clicks or onmouseover the header? Valid value: "click", "clickgo", or "mouseover"
mouseoverdelay: 200, //if revealtype="mouseover", set delay in milliseconds before header expands onMouseover
collapseprev: true, //Collapse previous content (so only one open at any time)? true/false
defaultexpanded: [0], //index of content(s) open by default [index1, index2, etc] [] denotes no content
onemustopen: true, //Specify whether at least one header should be open always (so never all headers closed)
animatedefault: false, //Should contents open by default be animated into view?
persiststate: true, //persist state of opened contents within browser session?
toggleclass: ["", "selected"], //Two CSS classes to be applied to the header when it's collapsed and expanded, respectively ["class1", "class2"]
togglehtml: ["", "", ""], //Additional HTML added to the header when it's collapsed and expanded, respectively ["position", "html1", "html2"] (see docs)
animatespeed: "normal", //speed of animation: integer in milliseconds (ie: 200), or keywords "fast", "normal", or "slow"
oninit:function(headers, expandedindices){ //custom code to run when headers have initalized
//do nothing
},
onopenclose:function(header, index, state, isuseractivated){ //custom code to run whenever a header is opened or closed
//do nothing
}
})

</script>

4. Kemudian Simpan kode dibawah ini sebelum ]]></b:skin>
.urbangreymenu{
width: 190px; /*width of menu*/
}

.urbangreymenu .headerbar{
font: bold 13px Verdana;
color: white;
background: #606060 url(arrowstop.gif) no-repeat 8px 6px; /*last 2 values are the x and y coordinates of bullet image*/
margin-bottom: 0; /*bottom spacing between header and rest of content*/
text-transform: uppercase;
padding: 7px 0 7px 31px; /*31px is left indentation of header text*/
}

.urbangreymenu .headerbar a{
text-decoration: none;
color: white;
display: block;
}

.urbangreymenu ul{
list-style-type: none;
margin: 0;
padding: 0;
margin-bottom: 0; /*bottom spacing between each UL and rest of content*/
}

.urbangreymenu ul li{
padding-bottom: 2px; /*bottom spacing between menu items*/
}

.urbangreymenu ul li a{
font: normal 12px Arial;
color: black;
background: #E9E9E9;
display: block;
padding: 5px 0;
line-height: 17px;
padding-left: 8px; /*link text is indented 8px*/
text-decoration: none;
}

.urbangreymenu ul li a:visited{
color: black;
}

.urbangreymenu ul li a:hover{ /*hover state CSS*/
color: white;
background: black;
}

5. Simpan kode dibawah ini pada HTML Anda
<div class="urbangreymenu">
<h3 class="headerbar"><a href="http://www.mutiaramail.blogspot.com">Blog Kita</a></h3>
<ul class="submenu">
<li><a href="http://www.mutiaramail.blogspot.com">Mutiaramail</a></li>
<li><a href="http://www.sumbloggers.blogspot.com">Blog Invest</a></li>
<li><a href="http://blogger-trade-online.blogspot.com">Harga Saham</a></li>
<li><a href="#">Edit</a></li>
<li><a href="#">Edit&lt;/a></li>
<li><a href="#">Edit</a></li>
</ul>

<h3 class="headerbar"><a href="#">Edit&lt;/a></h3>
<ul class="submenu">
<li><a href="#">Edit</a></li>
</ul>

</div>

6. Terakhir ganti kode yang berwarna biru dan anda bisa download JS dibawah ini :

3subs-Menu

Thursday, August 20, 2009 |

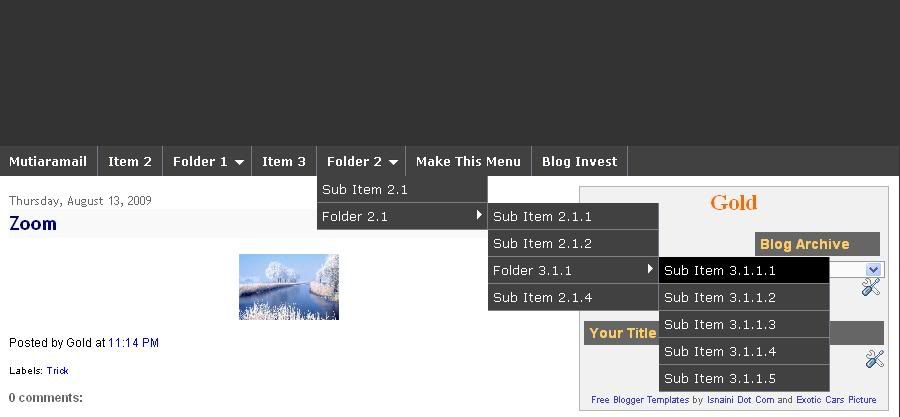
Hallo sobat yang budiman, kalo kita membicarakan masalah trick atau tips tidak akan ada habisnya. Nah ini saya punya salah satu macam Navigasi buat sobat.Contohnya seperti ini :

1-Log in ke account blogger anda.
2-Click Layout---->EDIT HTML,Jangan lupa beri tanda centang pada kotak EXPAND WIDGET sebelumnya anda backup dulu template sobat klik Download Template Lengkap lalu simpan pada folder anda.
3-Copy pastekan script di bawah ini sebelum kode ]]></b:skin> tag:
.jqueryslidemenu{
font: bold 12px Verdana;
background: #414141;
width: 100%;
}
.jqueryslidemenu ul{
margin: 0;
padding: 0;
list-style-type: none;
}

/*Top level list items*/
.jqueryslidemenu ul li{
position: relative;
display: inline;
float: left;
}
/*Top level menu link items style*/
.jqueryslidemenu ul li a{
display: block;
background: #414141; /*background of tabs (default state)*/
color: white;
padding: 8px 10px;
border-right: 1px solid #778;
color: #2d2b2b;
text-decoration: none;
}
* html .jqueryslidemenu ul li a{ /*IE6 hack to get sub menu links to behave correctly*/
display: inline-block;
}
.jqueryslidemenu ul li a:link, .jqueryslidemenu ul li a:visited{
color: white;
}
.jqueryslidemenu ul li a:hover{
background: black; /*tab link background during hover state*/
color: white;
}
/*1st sub level menu*/
.jqueryslidemenu ul li ul{
position: absolute;
left: 0;
display: block;
visibility: hidden;
}
/*Sub level menu list items (undo style from Top level List Items)*/
.jqueryslidemenu ul li ul li{
display: list-item;
float: none;
}
/*All subsequent sub menu levels vertical offset after 1st level sub menu */
.jqueryslidemenu ul li ul li ul{
top: 0;
}
/* Sub level menu links style */
.jqueryslidemenu ul li ul li a{
font: normal 13px Verdana;
width: 160px; /*width of sub menus*/
padding: 5px;
margin: 0;
border-top-width: 0;
border-bottom: 1px solid gray;
}
.jqueryslidemenuz ul li ul li a:hover{ /*sub menus hover style*/
background: #eff9ff;
color: black;
}
/* ######### CSS classes applied to down and right arrow images ######### */
.downarrowclass{
position: absolute;
top: 12px;
right: 7px;
}
.rightarrowclass{
position: absolute;
top: 6px;
right: 5px;
}

2.Tambah kode dibawah ini sebelum </head> tag:
<script src="http://jqueryjs.googlecode.com/files/jquery-1.3.2.min.js" type="text/javascript"></script>
<script type="text/javascript" src="http://yourhost.menu.js"></script>
<!--[if lte IE 7]>
<style type="text/css">
html .jqueryslidemenu{height: 1%;} /*Holly Hack for IE7 and below*/
</style>
<![endif]-->


Upload menu.js file ke hosting seperti (110mb.com,hotlinkfiles.com...)
kemudian pastekan ke kode yang berwarna biru.
3.Simpan kode dibawah ini kemudian letakkan pada HTML/Javscript, anda:
<div id="myslidemenu" class="jqueryslidemenu">
<ul>
<li><a href="http://mutiaramail.blogspot.com">Mutiaramail</a></li>
<li><a href="#">Item 2</a></li>
<li><a href="#">Folder 1</a>
<ul>
<li><a href="#">Sub Item 1.1</a></li>
<li><a href="#">Sub Item 1.2</a></li>
<li><a href="#">Sub Item 1.3</a></li>
<li><a href="#">Sub Item 1.4</a></li>
</ul>
</li>
<li><a href="#">Item 3</a></li>
<li><a href="#">Folder 2</a>
<ul>
<li><a href="#">Sub Item 2.1</a></li>
<li><a href="#">Folder 2.1</a>
<ul>
<li><a href="#">Sub Item 2.1.1</a></li>
<li><a href="#">Sub Item 2.1.2</a></li>
<li><a href="#">Folder 3.1.1</a>
<ul>
<li><a href="#">Sub Item 3.1.1.1</a></li>
<li><a href="#">Sub Item 3.1.1.2</a></li>
<li><a href="#">Sub Item 3.1.1.3</a></li>
<li><a href="#">Sub Item 3.1.1.4</a></li>
<li><a href="#">Sub Item 3.1.1.5</a></li>
</ul>
</li>
<li><a href="#">Sub Item 2.1.4</a></li>
</ul>
</li>
</ul>
</li>
<li><a href="http://mutiaramail.blogspot.com">Make This Menu</a></li>
<li><a href="http://sumbloggers.blogspot.com">Blog Invest</a></li>
</ul>
<br style="clear: left"/>
</div>

Selamat mencoba dan Semoga berhasil.

New Navigation

Monday, August 10, 2009 |

Hallo kawan saya ada Navigasi buat anda, mudah-mudahan anda menyukainya, oke kita mulai saja.
Letakkan code dibawah ini ditas </head>
<script type="text/javascript" src="http://ajax.googleapis.com/ajax/libs/jquery/1.3.2/jquery.min.js"></script>
<link rel="stylesheet" type="text/css" href="jkmegamenu.css" />
<script type="text/javascript" src="jkmegamenu.js">
/***********************************************
* jQuery Mega Menu- by JavaScript Kit (www.javascriptkit.com)
* This notice must stay intact for usage
* follow http://mutiaramail.blogspot.com
* Visit JavaScript Kit at http://www.javascriptkit.com/ for full source code
***********************************************/
</script>
<script type="text/javascript">
//jkmegamenu.definemenu("anchorid", "menuid", "mouseover|click")
jkmegamenu.definemenu("megaanchor", "megamenu1", "mouseover")
</script>

Kemudian Letakkan kode dibawah ini pada HTML anda
<!--Mega Menu Anchor-->
<a href="http://www.javascriptkit.com" id="megaanchor">Tech Links</a>
<!--Mega Drop Down Menu HTML. Retain given CSS classes-->
<div id="megamenu1" class="megamenu">
<div class="column">
<h3>Web Development</h3>
<ul>
<li><a href="http://www.mutiaramail.blogspot.com">Mutiaramail</a></li>
<li><a href="http://www.sumbloggers.blogspot.com/">Bloginvest</a></li>
<li><a href="Link 1">Link 1</a></li>
<li><a href="Link 2">Link 2</a></li>
<li><a href="Link 3">Link 3</a></li>
</ul>
</div>

<div class="column">
<h3>News Related</h3>
<ul>
<li><a href="http://www.cnn.com/">CNN</a></li>
<li><a href="http://www.msnbc.com">MSNBC</a></li>
<li><a href="http://www.google.com">Google</a></li>
<li><a href="http://news.bbc.co.uk">BBC News</a></li>
</ul>
</div>

<div class="column">
<h3>Technology</h3>
<ul>
<li><a href="http://www.news.com/">News.com</a></li>
<li><a href="http://www.slashdot.com">SlashDot</a></li>
<li><a href="http://www.digg.com">Digg</a></li>
<li><a href="http://www.techcrunch.com">Tech Crunch</a></li>
</ul>
</div>

<br style="clear: left" /> <!--Break after 3rd column. Move this if desired-->

<div class="column">
<h3>Web Development</h3>
<ul>
<li><a href="http://mutiaramail.blogspot.com">JavaScript Kit</a></li>
<li><a href="http://mutiaramail.blogspot.com/">Dynamic Drive</a></li>
<li><a href="http://mutiaramail.blogspot.com">CSS Drive</a></li>
<li><a href="http://mutiaramail.blogspot.com">Coding Forums</a></li>
<li><a href="http://mutiaramail.blogspot.com/">DOM Reference</a></li>
</ul>
</div>

<div class="column">
<h3>News Related</h3>
<ul>
<li><a href="http://www.cnn.com/">CNN</a></li>
<li><a href="http://www.msnbc.com">MSNBC</a></li>
<li><a href="http://www.google.com">Google</a></li>
<li><a href="http://news.bbc.co.uk">BBC News</a></li>
</ul>
</div>

<div class="column">
<h3>Technology</h3>
<ul>
<li><a href="http://www.news.com/">News.com</a></li>
<li><a href="http://www.slashdot.com">SlashDot</a></li>
<li><a href="http://www.digg.com">Digg</a></li>
<li><a href="http://www.techcrunch.com">Tech Crunch</a></li>
</ul>
</div>
</div>


Selamat mencoba dan semoga anda sukses.

Cara memasang CSS Indent Menu

Tuesday, July 28, 2009 |

Hallo friend, saya ada tip untuk Navigasi ya mungkin warnanya cocok sama template anda, tapi saya gak ada contohnya, tapi gampang kok tinggal backup template anda lau coba untuk lihat hasilnya.Ok kita mulai aja ya saya gak perlu lama-lama.

Letakkan kode dibawah , diatas kode ini ]]></b:skin>;
<style type="text/css">

/*Credits: Dynamic Drive CSS Library */
/*URL: http://www.dynamicdrive.com/style/ */

.indentmenu{
font: bold 13px Arial;
width: 100%; /*leave this value as is in most cases*/
overflow: hidden;
}

.indentmenu ul{
margin: 0;
padding: 0;
float: left;
width: 100%; /*width of menu*/
border: 1px solid #564c66; /*dark purple border*/
border-width: 1px 0;
background: black url(http://i721.photobucket.com/albums/ww218/sugwi/indentbg.gif) center center repeat-x;
}

.indentmenu ul li{
display: inline;
}

.indentmenu ul li a{
float: left;
color: white; /*text color*/
padding: 5px 11px;
text-decoration: none;
border-right: 1px solid #564c66; /*dark purple divider between menu items*/
}

.indentmenu ul li a:visited{
color: white;
}

.indentmenu ul li a:hover, .indentmenu ul li .current{
color: white !important; /*text color of selected and active item*/
padding-top: 6px; /*shift text down 1px for selected and active item*/
padding-bottom: 4px; /*shift text down 1px for selected and active item*/
background: black url(http://i721.photobucket.com/albums/ww218/sugwi/indentbg2.gif) center center repeat-x;
}

</style>

Lalu pasang kode dibawah ini pada HTML anda
<div class='indentmenu'>
<ul>
<li><a href='http://www.mutiaramail.blogspot.com/'>Home</a></li>
<li><a class='current' href='Link 1/'>Link 1</a></li>
<li><a href='Link 2/'>Link 2</a></li>
<li><a href='Link 3'>Link 3</a></li>
<li><a href='Link 4/'>Link 4</a></li>
<li><a href='Link 5'>Link 5</a></li>
</ul>
</div>


Setelah itu lihat hasilnya, anda suka? Selamat mencoba semoga sukses

Cara Memasang Menu Navigasi I Blue Colour

Thursday, July 23, 2009 |

Dalam Black version sudah saya sampaikan, dan yang ini hanya mengulang
Anda sudah siap? kita mulai :
1.Letakkan code CSS dibawah ini sebelum ]]></b:skin> tag:
<style type="text/css">
.aerobuttonmenu{ /*container that holds a row of aero buttons*/
overflow: hidden; /*See: http://www.quirksmode.org/css/clearing.html */
width: auto;
background: #F7F7F7; /*menu strip background*/
border: 1px solid gray;
padding: 4px 0;
border-width: 1px 0;
}
* html .aerobuttonmenu{ /*IE6 and below hack. Set explicit strip width*/
width: 100%;
}
.aerobuttonmenu a.aero{ /*aero button CSS*/
background: transparent url('http://i721.photobucket.com/albums/ww218/sugwi/aeroleft.gif') no-repeat top left;
display: block;
float: left;
font: bold 13px Verdana, Trebuchet MS; /* Change 13px as desired */
line-height: 23px; /* This value + 8px should equal height of button background (default is 31px) */
height: 31px; /* Height of button background height */
padding-left: 10px; /* Width of left menu image */
text-decoration: none;
margin-right: 5px; /*spacing between buttons*/
filter:progid:DXImageTransform.Microsoft.Alpha(opacity=90); /*this and next two rules control opacity of buttons before hover*/
opacity: 0.9;
-moz-opacity: 0.9;
}
.aerobuttonmenu a.aero:link, .aerobuttonmenu a.aero:visited, .aerobuttonmenu a:active{
color: white; /*button text color*/
}
.aerobuttonmenu a.aero span{
background: transparent url('http://i721.photobucket.com/albums/ww218/sugwi/aeroright.gif') no-repeat top right;
display: block;
padding: 4px 10px 6px 0; /*Set 10px here to match value of 'padding-left' value above*/
}
.aerobuttonmenu a.aero:hover{ /* Hover state CSS */
filter:progid:DXImageTransform.Microsoft.Alpha(opacity=100); /*this and next two rules control opacity of buttons during hover*/
opacity: 1;
-moz-opacity: 0.99;
}
.aerobuttonmenu a.aero:hover span{ /* Hover state CSS (for text) */
color: yellow;
}
.black a.aero{
background-image: url('http://i721.photobucket.com/albums/ww218/sugwi/aeroleft.gif');
}
.black a.aero span{
background-image: url('http://i721.photobucket.com/albums/ww218/sugwi/aeroright.gif');
}
.aerobuttonmenu .rightsection{
float: right;
width: 100px;
position: relative;
top: 3px;
padding-right: 5px;
text-align: right;
}
.aerobuttonmenu .rightsection a{
color: navy;
}
</style>

2.Tambah dan Simpan kode dibawah ini pada HTML/Javascript.
<div class="aerobuttonmenu">
<div class="rightsection">
<a href="#"><img src="http://hussen-blogging.blogspot.com"/></a>
</div>
<a href="http://hussen-blogging.blogspot.com"><span>Home</span></a>
<a href="http://mutiaramail.blogspot.com"><span>Mutiaramail</span></a>
<a href="http://sumbloggers.blogspot.com"><span>Blog Invest</span></a>
<a href="http://zone-online-blitz.blogspot.com"><span>Mita Zone</span></a>
</div>

Ok selesei dan semoga anda sukses.

Cara Memasang Menu Navigasi I Black Colour

|

Hallo soabat saya ada tips buat anda bagaimana cara memasang Menu Navigasi yang mana bagi blogger pemula mungkin cukup dibutuhkan lain halnya bagi yang senior. Sayapun juga masih belajar dan saya juga menerima ide dari rekan-rekan bila ada ya biar penuh dengan tips. Sorry saya sampai lupa, oke kita mulai saja, begini ceritanya...
Anda sudah siap? kita mulai :
1.Letakkan code CSS dibawah ini sebelum ]]></b:skin> tag:
<style type="text/css">
.aerobuttonmenu{ /*container that holds a row of aero buttons*/
overflow: hidden; /*See: http://www.quirksmode.org/css/clearing.html */
width: auto;
background: #F7F7F7; /*menu strip background*/
border: 1px solid gray;
padding: 4px 0;
border-width: 1px 0;
}
* html .aerobuttonmenu{ /*IE6 and below hack. Set explicit strip width*/
width: 100%;
}
.aerobuttonmenu a.aero{ /*aero button CSS*/
background: transparent url('http://i721.photobucket.com/albums/ww218/sugwi/aeroleftblack.gif') no-repeat top left;
display: block;
float: left;
font: bold 13px Verdana, Trebuchet MS; /* Change 13px as desired */
line-height: 23px; /* This value + 8px should equal height of button background (default is 31px) */
height: 31px; /* Height of button background height */
padding-left: 10px; /* Width of left menu image */
text-decoration: none;
margin-right: 5px; /*spacing between buttons*/
filter:progid:DXImageTransform.Microsoft.Alpha(opacity=90); /*this and next two rules control opacity of buttons before hover*/
opacity: 0.9;
-moz-opacity: 0.9;
}
.aerobuttonmenu a.aero:link, .aerobuttonmenu a.aero:visited, .aerobuttonmenu a:active{
color: white; /*button text color*/
}
.aerobuttonmenu a.aero span{
background: transparent url('http://i721.photobucket.com/albums/ww218/sugwi/aerorightblack.gif') no-repeat top right;
display: block;
padding: 4px 10px 6px 0; /*Set 10px here to match value of 'padding-left' value above*/
}
.aerobuttonmenu a.aero:hover{ /* Hover state CSS */
filter:progid:DXImageTransform.Microsoft.Alpha(opacity=100); /*this and next two rules control opacity of buttons during hover*/
opacity: 1;
-moz-opacity: 0.99;
}
.aerobuttonmenu a.aero:hover span{ /* Hover state CSS (for text) */
color: yellow;
}
.black a.aero{
background-image: url('http://i721.photobucket.com/albums/ww218/sugwi/aeroleftblack.gif');
}
.black a.aero span{
background-image: url('http://i721.photobucket.com/albums/ww218/sugwi/aerorightblack.gif');
}
.aerobuttonmenu .rightsection{
float: right;
width: 100px;
position: relative;
top: 3px;
padding-right: 5px;
text-align: right;
}
.aerobuttonmenu .rightsection a{
color: navy;
}
</style>

2.Tambah dan Simpan kode dibawah ini pada HTML/Javascript.
<div class="aerobuttonmenu black">
<div class="rightsection">
<a href="#"><img src="http://hussen-blogging.blogspot.com"/></a>
</div>
<a href="http://hussen-blogging.blogspot.com"><span>Home</span></a>
<a href="http://mutiaramail.blogspot.com"><span>Mutiaramail</span></a>
<a href="http://sumbloggers.blogspot.com"><span>Blog Invest</span></a>
<a href="http://zone-online-blitz.blogspot.com"><span>Mita Zone</span></a>
</div>


Terima kasih atas kunjungannya semoga anda berhasil